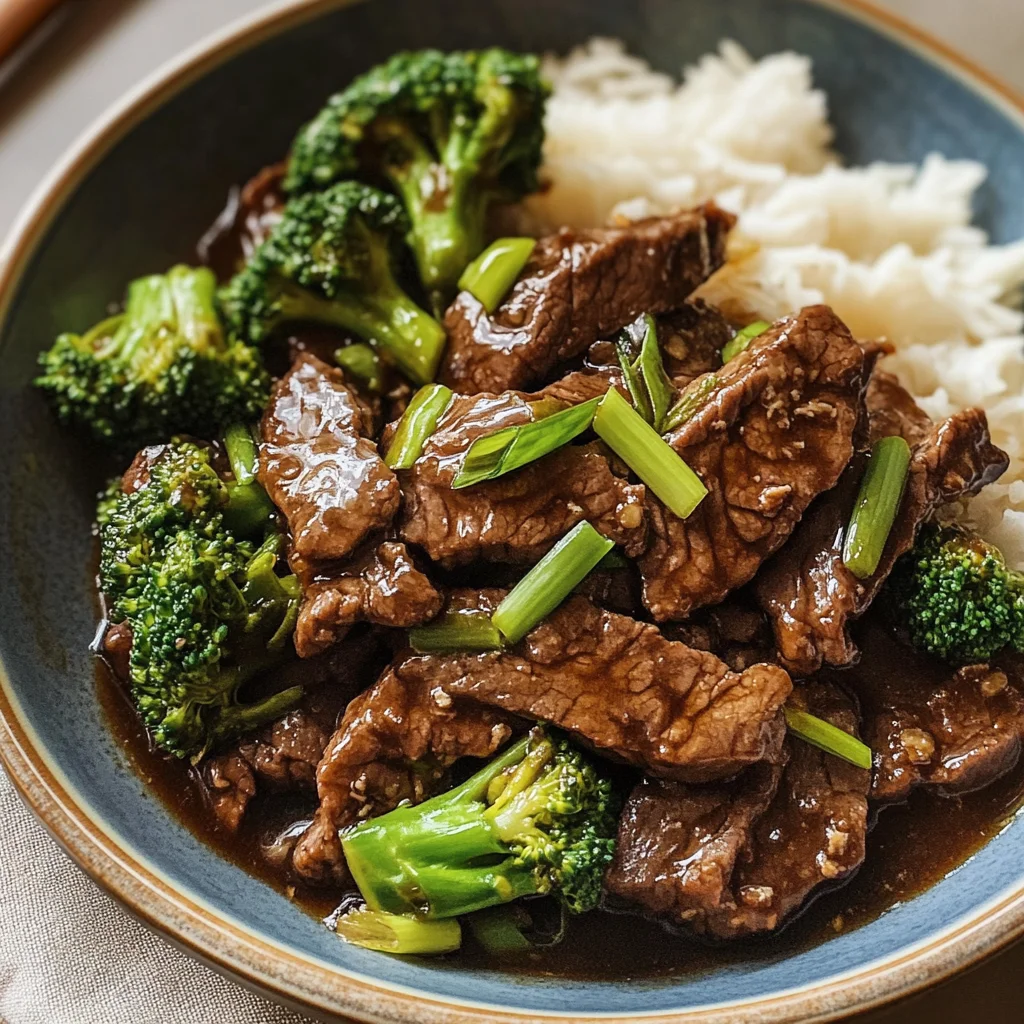
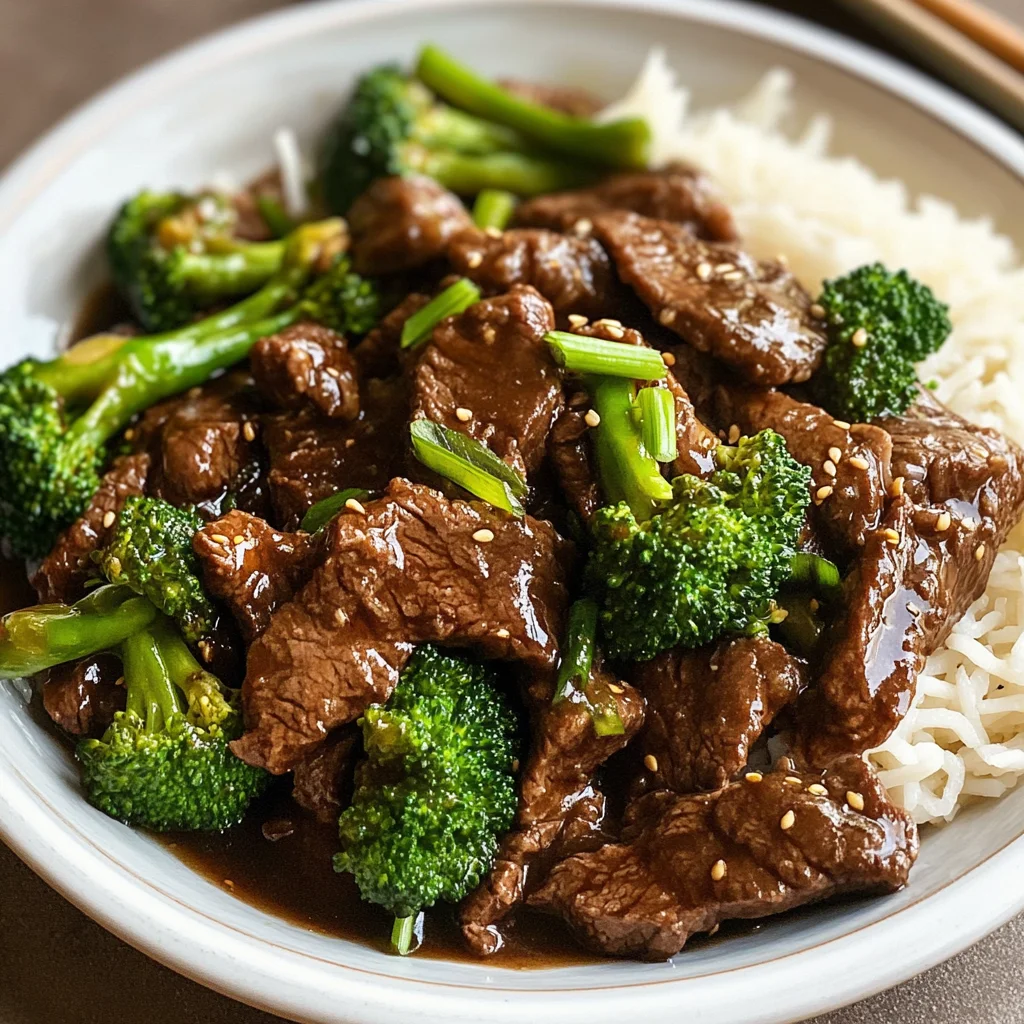
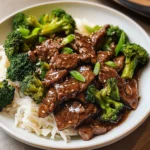
Gluten Free Mongolian Beef
This Gluten Free Mongolian Beef with Broccoli is an exquisite dish that brings the flavors of Asian cuisine right to your kitchen. It’s not only a great option for a weeknight dinner but can also impress guests at special occasions. This recipe stands out because it’s soy-free and gluten-free, making it suitable for those with dietary restrictions without sacrificing flavor. You’ll love how quickly you can whip up this delectable meal, leaving you with more time to enjoy!
Why You’ll Love This Recipe
- Easy to Prepare: This dish comes together in under an hour, perfect for a busy weeknight.
- Flavor Packed: Rich flavors from coconut aminos and spices make every bite delicious.
- Health-Conscious Option: With gluten-free and soy-free ingredients, this recipe caters to various dietary needs.
- Versatile Serving Suggestions: Enjoy it over rice or cauliflower rice for a complete meal.
- Impressive Presentation: The vibrant colors of broccoli and beef make this dish visually appealing.
Tools and Preparation
Before diving into making your Gluten Free Mongolian Beef, gather your essential tools and prepare your workspace. Having everything ready allows for a smoother cooking process.
Essential Tools and Equipment
- Large deep skillet
- Whisk
- Sharp knife
- Wooden spoon
- Mixing bowl
Importance of Each Tool
- Large deep skillet: Ideal for cooking the beef without overcrowding, ensuring even cooking.
- Whisk: Essential for combining the sauce ingredients thoroughly and achieving a smooth consistency.
- Sharp knife: Necessary for slicing the flank steak against the grain, which ensures tender pieces.
Ingredients
This Mongolian Beef with Broccoli is flavorful, simple, and better than takeout! This version is soy-free and gluten-free.
For the Sauce
- 1/3 cup coconut aminos
- 1/4 cup beef broth
- 1 tbsp rice vinegar (sub apple cider vinegar for AIP)
- 3 cloves garlic (minced)
- 1 thumb ginger (grated)
- 2 tsp coconut sugar
- Salt and pepper
For Cooking
- 2 tsp arrowroot starch
- 3-4 tbsp avocado oil (divided)
For the Beef and Vegetables
- 1 1/2 cup broccoli florets
- 1 tsp sea salt (divided)
- 1/2 tsp black pepper (omit for AIP)
- 1.5 lb flank steak
- 2 tbsp arrowroot starch
- 3 green onions (sliced into 1 strips)
How to Make Gluten Free Mongolian Beef
Step 1: Prepare the Sauce
Combine all sauce ingredients in a mixing bowl:
1. Mix together the coconut aminos, beef broth, coconut sugar, 2 tsp of arrowroot starch, minced garlic, grated ginger, salt, and pepper.
2. Whisk well until fully combined and set aside.
Step 2: Cook the Broccoli
In a large deep skillet:
1. Heat 1-2 tbsp of avocado oil over medium heat.
2. Add broccoli florets along with a pinch of salt and pepper.
3. Cook for about 6-7 minutes or until fork-tender.
4. Remove from pan and set aside; clean out the pan afterward.
Step 3: Prepare the Flank Steak
For best results:
1. Season both sides of the flank steak with salt and pepper.
2. Slice against the grain into approximately 1 bite-sized pieces.
3. Place sliced steak in a bowl with arrowroot starch; coat thoroughly.
Step 4: Cook the Steak
In the same skillet used for broccoli:
1. Heat an additional 2 tbsp of avocado oil until hot and shimmering.
2. Add half of the steak slices in a single layer to avoid overcrowding.
3. Cook each side for about 2-3 minutes until crisped; transfer cooked steak to a clean plate.
Step 5: Make the Sauce Thicker
To enhance flavor:
1. Pour prepared sauce mixture back into the pan slowly while scraping up any browned bits from cooking beef.
2. Allow to simmer for about 3-4 minutes or until fragrant and slightly thickened.
Step 6: Combine Ingredients
To finish:
1. Add sliced green onions, cooked beef, and broccoli back into the pan.
2. Reduce heat; toss everything together until fully coated with sauce.
3. Serve fresh alongside steamed rice or cauliflower rice as desired.
Enjoy your delicious homemade Gluten Free Mongolian Beef!
How to Serve Gluten Free Mongolian Beef
Serving your Gluten Free Mongolian Beef can elevate the meal and make it even more enjoyable. Here are some creative suggestions to complement this flavorful dish.
With Steamed Rice
- Steamed white or brown rice offers a classic pairing that soaks up the delicious sauce.
Cauliflower Rice
- For a low-carb option, serve with cauliflower rice. It adds texture without the extra carbs.
Stir-Fried Vegetables
- A mix of colorful stir-fried vegetables can add crunch and nutrition to your plate.
Asian Cucumber Salad
- A refreshing cucumber salad with sesame dressing provides a cool contrast to the warm beef.
Lettuce Wraps
- Serve in crisp lettuce leaves for a fun, hands-on dining experience that’s light and fresh.
Noodles
- Pair it with gluten-free noodles for a heartier meal. Rice noodles work particularly well.
How to Perfect Gluten Free Mongolian Beef
Perfecting your Gluten Free Mongolian Beef is all about attention to detail. Here are some tips to ensure you achieve the best results.
- Use high-quality flank steak: Selecting fresh, well-marbled flank steak will enhance the flavor and tenderness of your dish.
- Marinate for flavor: If you have time, marinate the steak in the sauce for at least 30 minutes before cooking for deeper flavor.
- Cook in batches: Avoid overcrowding the pan when cooking the beef. This helps achieve that perfect sear.
- Adjust sauce thickness: For a thicker sauce, let it simmer longer or add an extra teaspoon of arrowroot starch mixed with water.
- Garnish generously: Top with extra green onions or sesame seeds for added flavor and visual appeal.
- Serve immediately: Enjoy your meal right after cooking for the best texture and taste.
Best Side Dishes for Gluten Free Mongolian Beef
Pairing side dishes with Gluten Free Mongolian Beef can enhance your dining experience. Here’s a selection of great options to consider:
-
Steamed Broccoli
A nutritious choice that complements the beef and adds vibrant color to your plate. -
Sesame Green Beans
Lightly sautéed green beans tossed in sesame oil bring a nutty flavor that pairs perfectly. -
Quinoa Salad
A protein-packed salad with cucumbers and tomatoes offers freshness alongside rich flavors. -
Fried Rice (Gluten-Free)
Use gluten-free soy sauce or coconut aminos to create a delicious fried rice that absorbs all those savory flavors. -
Roasted Sweet Potatoes
Their natural sweetness balances out the savory notes of Mongolian beef beautifully. -
Miso Soup
A warm bowl of miso soup can serve as a comforting starter before diving into your main dish. -
Asian Slaw
Crunchy cabbage slaw with a tangy dressing adds texture and contrast while being light on calories. -
Zucchini Noodles
For a fun twist, use zucchini noodles instead of traditional pasta, creating a healthy base that soaks up the sauce well.
Common Mistakes to Avoid
Making Gluten Free Mongolian Beef can be simple, but there are a few common mistakes you should avoid for the best results.
- Skipping marinating the beef: Marinating adds depth of flavor. Ensure you allow the flank steak to marinate for at least 15 minutes before cooking.
- Using too much heat: High heat can lead to overcooked meat. Cook the beef on medium-high heat to achieve a tender texture while ensuring it’s cooked through.
- Not coating the beef properly: Failing to coat the beef with arrowroot starch can result in a less crispy texture. Make sure every piece is evenly coated for that perfect crunch.
- Overcrowding the pan: Adding too much beef at once can lower the pan’s temperature and steam instead of sear. Cook in batches to ensure proper browning.
- Neglecting to scrape the pan: Leaving browned bits in the pan can miss out on flavor. Always scrape up those bits when adding your sauce for enhanced taste.
Storage & Reheating Instructions
Refrigerator Storage
- Store your Gluten Free Mongolian Beef in an airtight container.
- It will last for up to 3-4 days in the refrigerator.
Freezing Gluten Free Mongolian Beef
- This dish can be frozen for up to 2 months.
- Make sure it is completely cooled before transferring it to a freezer-safe container.
Reheating Gluten Free Mongolian Beef
- Oven: Preheat to 350°F (175°C) and reheat covered for about 20 minutes or until heated through.
- Microwave: Heat on medium power for 1-2 minutes, stirring halfway through, until warm.
- Stovetop: Warm in a skillet over low heat, stirring occasionally, until hot.
Frequently Asked Questions
Here are some frequently asked questions about making Gluten Free Mongolian Beef that might help you out.
Can I use other cuts of meat?
Yes, you can substitute flank steak with sirloin or ribeye for different flavors and textures.
Is this dish suitable for meal prep?
Absolutely! Gluten Free Mongolian Beef is great for meal prep as it stores well and reheats easily.
How spicy is Gluten Free Mongolian Beef?
This recipe is not spicy. If you prefer heat, consider adding red pepper flakes or fresh chili.
Can I make this recipe AIP-friendly?
Yes! Substitute ingredients like coconut aminos with apple cider vinegar and omit black pepper.
Final Thoughts
Gluten Free Mongolian Beef is not only delicious but also incredibly versatile. You can customize it by adding your favorite vegetables or adjusting spices to suit your taste. Give it a try tonight—it’s bound to become a family favorite!
Gluten Free Mongolian Beef
Indulge in this Gluten Free Mongolian Beef, a delightful fusion of flavors that effortlessly brings the taste of Asian cuisine to your dining table. This recipe is not just quick and easy; it’s also soy-free and gluten-free, making it a wonderful option for those with dietary restrictions. In less than an hour, you can prepare a meal that will impress both family and guests alike. The tender flank steak combined with vibrant broccoli is not only visually appealing but also packed with flavor thanks to the luscious coconut aminos and aromatic spices. Serve it over rice or cauliflower rice for a satisfying dinner that leaves you feeling good about your meal choice.
- Prep Time: 15 minutes
- Cook Time: 30 minutes
- Total Time: 45 minutes
- Yield: Serves 4
- Category: Main
- Method: Stir-Frying
- Cuisine: Asian
Ingredients
- 1/3 cup coconut aminos
- 1/4 cup beef broth
- 1 tbsp rice vinegar (sub apple cider vinegar for AIP)
- 3 cloves garlic (minced)
- 1 thumb ginger (grated)
- 2 tsp coconut sugar
- Salt and pepper
- 2 tsp arrowroot starch
- 3–4 tbsp avocado oil (divided)
- 1 1/2 cup broccoli florets
- 1 tsp sea salt (divided)
- 1/2 tsp black pepper (omit for AIP)
- 1.5 lb flank steak
- 2 tbsp arrowroot starch
- 3 green onions (sliced into 1" strips)
Instructions
- In a mixing bowl, combine coconut aminos, beef broth, rice vinegar, minced garlic, grated ginger, coconut sugar, salt, and pepper. Whisk until smooth.
- Heat 1-2 tablespoons of avocado oil in a large skillet over medium heat and cook the broccoli until fork-tender (about 6-7 minutes). Set aside.
- Season flank steak with salt and pepper, then slice against the grain into bite-sized pieces. Coat with arrowroot starch.
- In the same skillet, heat 2 tablespoons of avocado oil until shimmering. Cook half the steak pieces for 2-3 minutes per side until crisped. Remove from skillet.
- Pour sauce mixture into the skillet, scraping any browned bits from the bottom. Simmer for 3-4 minutes until slightly thickened.
- Add cooked beef, broccoli, and sliced green onions to the sauce; toss to coat evenly before serving.
Nutrition
- Serving Size: 1 cup (240g)
- Calories: 340
- Sugar: 4g
- Sodium: 600mg
- Fat: 16g
- Saturated Fat: 3g
- Unsaturated Fat: 12g
- Trans Fat: 0g
- Carbohydrates: 18g
- Fiber: 2g
- Protein: 32g
- Cholesterol: 90mg