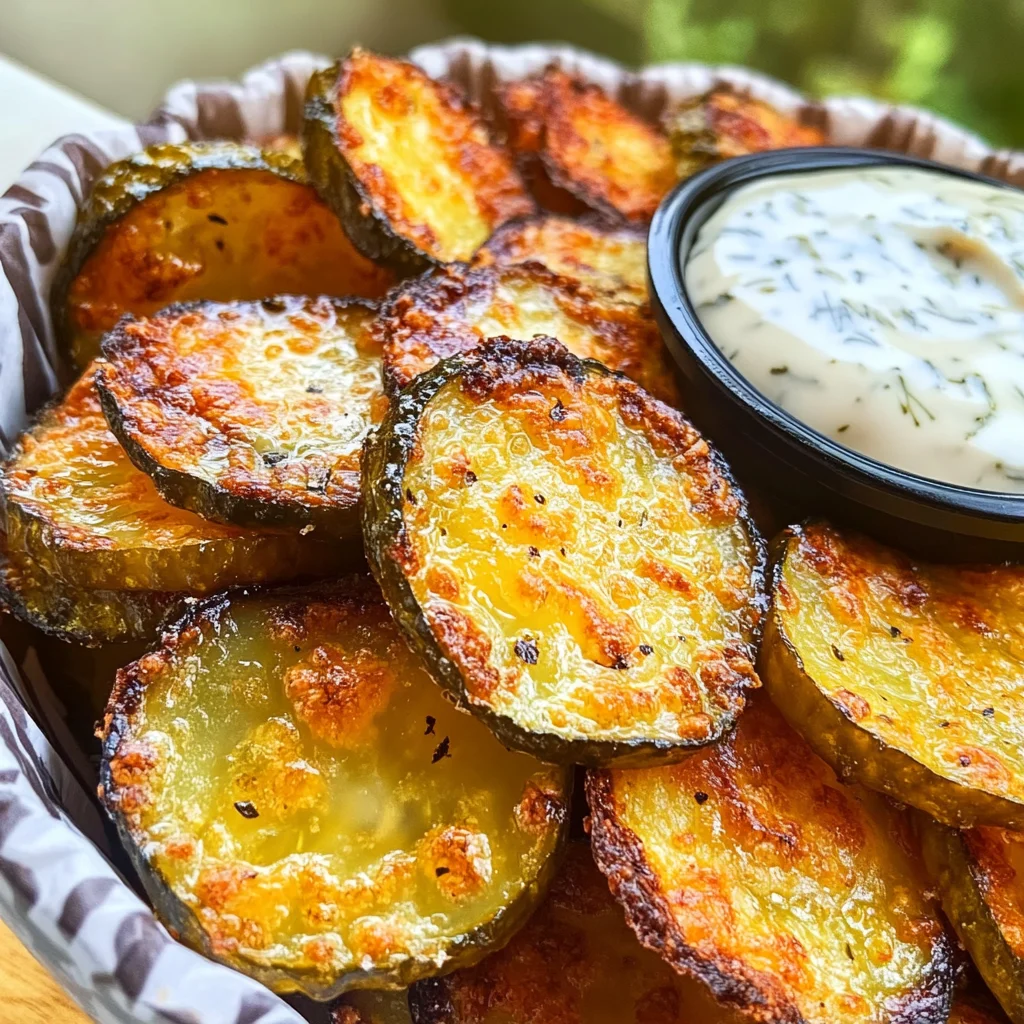
Crispy Cheesy Dill Pickle Chips
If you’re craving a delicious and unique snack, look no further than Crispy Cheesy Dill Pickle Chips! This tasty treat combines the tangy crunch of dill pickles with the gooey goodness of melted cheese. Perfect for game day, parties, or just a cozy night in, these cheesy pickle chips are sure to impress your family and friends. With their crispy exterior and cheesy interior, they make for an irresistible appetizer or side dish that everyone will love.
Why You’ll Love This Recipe
- Easy to Make: With just a few simple steps and minimal prep time, you’ll have a delicious snack ready in no time.
- Flavor Packed: The combination of cheese and dill pickles creates an explosion of flavor that’s hard to resist.
- Versatile Snack: These chips can be enjoyed on their own or paired with your favorite dipping sauce for added taste.
- Family Friendly: Kids and adults alike will enjoy munching on these delightful cheesy bites.
- Low Carb Option: Ideal for those following low-carb or keto diets without sacrificing flavor.
Tools and Preparation
Before you dive into making your Crispy Cheesy Dill Pickle Chips, gather your tools and prepare your kitchen. Having everything ready will make the cooking process smoother.
Essential Tools and Equipment
- Non-stick 12-cup muffin tin
- Cooking spray
- Paper towels
Importance of Each Tool
- Non-stick 12-cup muffin tin: This tool is crucial for shaping your cheesy pickle chips perfectly, ensuring they pop out easily after baking.
- Cooking spray: Helps prevent sticking, making it easier to remove the chips from the muffin tin without any fuss.
- Paper towels: Used to pat dry the dill pickle chips, ensuring they crisp up nicely during baking.
Ingredients
For these Crispy Cheesy Dill Pickle Chips, you will need:
- 2 cups Shredded Cheese (I used Colby Jack)
- 24 – 36 Dill Pickle Chips (as needed)
- 1 tbsp. Blackening Seasoning
How to Make Crispy Cheesy Dill Pickle Chips
Step 1: Preheat the Oven
Preheat your oven to 400F. While it heats up, take 24 – 36 dill pickle chips and pat them dry on a few paper towels. This step helps remove excess moisture for crispier chips.
Step 2: Prepare the Muffin Tin
Grab a non-stick 12-cup muffin tin. If desired, spray it with non-stick cooking spray. Fill each cup with a big pinch of shredded cheese. Top each cheese cup with two or three dill pickle chips. Next, sprinkle your favorite seasoning blend into each cup and cover with more cheese to ensure the pickles are adequately topped.
Step 3: Bake the Chips
Bake in the preheated oven for about 15 minutes or until the cheese has melted and browned nicely. Keep an eye on them to avoid burning!
Step 4: Optional Extra Crisp
After baking, you can take each cheesy pickle chip out of the muffin tin and place them in an air fryer at 400F for an additional 5 minutes if you want extra crispiness.
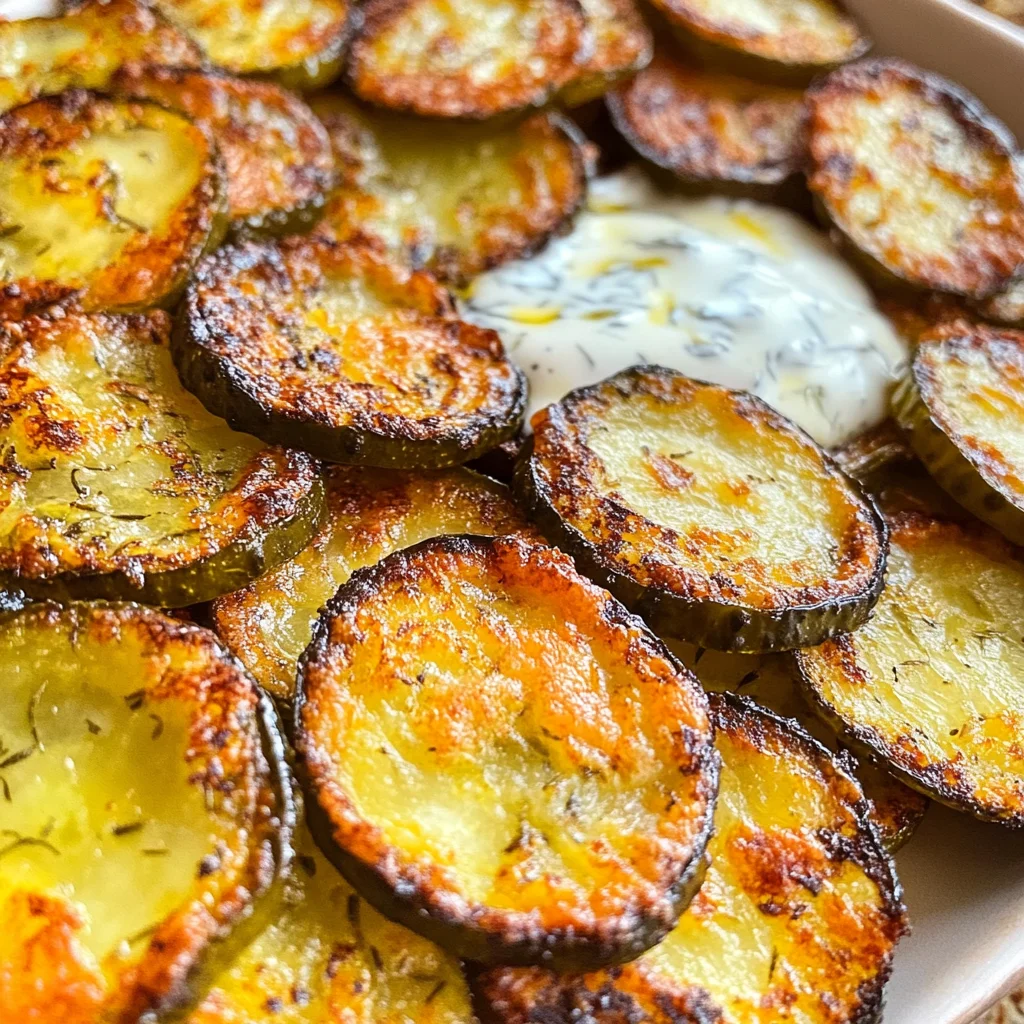
Step 5: Serve
Serve immediately with your favorite dipping sauce. I especially love these crispy cheesy dill pickle chips with ranch dressing or my Tangy Alabama White Sauce for an extra kick!
How to Serve Crispy Cheesy Dill Pickle Chips
Crispy Cheesy Dill Pickle Chips make for a delightful snack or appetizer. They pair well with various dips and sides, enhancing their cheesy goodness.
With Dipping Sauces
- Ranch Dressing: A classic pairing that adds creamy flavor to your crispy chips.
- Tangy Alabama White Sauce: This sauce offers a unique twist with its zesty and tangy notes.
- Spicy Ketchup: For those who enjoy a bit of heat, spicy ketchup complements the crunch perfectly.
As Part of a Platter
- Cheese and Meat Board: Add these chips to a charcuterie board for an exciting crunch among cheeses and cured meats.
- Veggie Platter: Serve alongside fresh veggies for a balanced snack option that’s fun and colorful.
At Parties or Gatherings
- Game Day Snack: These chips are perfect for watching sports, offering a tasty treat that everyone will love.
- Potluck Dish: Bring them to share at gatherings; they’re sure to be a hit among guests.
How to Perfect Crispy Cheesy Dill Pickle Chips
To achieve the ultimate texture and flavor in your Crispy Cheesy Dill Pickle Chips, consider these tips:
- seasoning choice: Using blackening seasoning enhances the overall flavor profile, making each bite savory.
- Pat dry thoroughly: Ensure your dill pickle chips are dry before adding cheese to prevent sogginess.
- Don’t overcrowd muffin tins: Leave enough space between each cheesy cup for even cooking and crisping.
- Watch baking time closely: Keep an eye on the chips while baking; remove them once they’re golden brown for the best texture.
- Optional air fryer step: For extra crispiness, air fry the baked chips briefly after removing them from the oven.
Best Side Dishes for Crispy Cheesy Dill Pickle Chips
Crispy Cheesy Dill Pickle Chips can be paired with several side dishes that enhance your dining experience. Here are some great options:
- Creamy Coleslaw: A refreshing side that balances the richness of the cheesy chips.
- Potato Wedges: These crispy potatoes offer another crunchy element that pairs well with the pickles.
- Buffalo Cauliflower Bites: Spicy cauliflower bites add a veggie option with a kick, complementing the flavors beautifully.
- Garlic Breadsticks: Soft, buttery breadsticks make for an indulgent pairing with your crispy snacks.
- Mini Pretzels: These salty bites offer another crunchy option that goes hand-in-hand with dips.
- Stuffed Jalapeños: For those who enjoy heat, these spicy bites enhance the flavor profile of your meal.
Common Mistakes to Avoid
When making Crispy Cheesy Dill Pickle Chips, a few common errors can detract from your delicious results. Here are some mistakes to watch out for:
- Skipping the drying step – If you don’t pat the pickle chips dry, they might release moisture during baking, leading to soggy chips. Always dry them thoroughly before use.
- Overcrowding the muffin tin – Filling each cup too much can cause uneven cooking. Stick to 2-3 pickle chips per cup for optimal results.
- Neglecting seasoning – Forgetting to add seasoning can result in bland chips. Don’t skip this step; choose your favorite blend for extra flavor.
- Not using the right cheese – Using cheese that doesn’t melt well will lead to disappointing results. Colby Jack is a great choice because it melts perfectly.
- Underestimating cook time – Baking for less than the recommended time may leave your chips undercooked. Keep an eye on them and adjust if necessary.
Storage & Reheating Instructions
Refrigerator Storage
- Store leftover Crispy Cheesy Dill Pickle Chips in an airtight container.
- They will stay fresh in the fridge for up to 3 days.
Freezing Crispy Cheesy Dill Pickle Chips
- Place cooled chips in a single layer on a baking sheet.
- Freeze them for about 1 hour, then transfer to a freezer-safe bag or container.
- They can be stored frozen for up to 2 months.
Reheating Crispy Cheesy Dill Pickle Chips
- Oven – Preheat oven to 350°F and bake for about 10 minutes until crispy again.
- Microwave – Heat on a microwave-safe plate for about 30 seconds, but they may lose crispiness.
- Stovetop – Warm in a skillet over medium heat for about 3-5 minutes, turning frequently.
Frequently Asked Questions
Here are some common questions people have about making Crispy Cheesy Dill Pickle Chips:
How To Make Crispy Cheesy Dill Pickle Chips?
Making these chips is easy! Follow the recipe carefully, ensuring you dry the pickles and layer cheese properly in the muffin tin.
Can I use different cheeses?
Absolutely! While Colby Jack is recommended, feel free to experiment with mozzarella or cheddar for varied flavors and textures.
Are Crispy Cheesy Dill Pickle Chips healthy?
These chips are lower in carbs compared to traditional snacks, making them a great option for keto diets. However, moderation is key!
What dipping sauces pair well with these chips?
Mild sauces like ranch or tangy options like Alabama White Sauce elevate these crispy treats. Get creative with your favorites!
Final Thoughts
Crispy Cheesy Dill Pickle Chips offer an irresistible combination of flavors and textures that make them perfect for snacking. Customize them by trying different cheeses or seasonings based on your taste preferences. Whether enjoyed alone or with a dip, these chips are sure to become a family favorite!
Crispy Cheesy Dill Pickle Chips
Crispy Cheesy Dill Pickle Chips are the ultimate snack for those craving a flavorful and crunchy treat. Combining the tangy zest of dill pickles with the rich, gooey goodness of melted cheese, these chips are perfect for game days, parties, or a cozy night in. With their delightful crispy exterior and cheesy center, they make an irresistible appetizer that everyone will adore. Easy to prepare and low in carbs, these cheesy pickle snacks will impress both kids and adults alike. Serve them with your favorite dipping sauce for an even more delicious experience!
- Prep Time: 10 minutes
- Cook Time: 15 minutes
- Total Time: 25 minutes
- Yield: Approximately 12 crispy chips (6 servings) 1x
- Category: Snack/Appetizer
- Method: Baking
- Cuisine: American
Ingredients
- 2 cups shredded cheese (Colby Jack recommended)
- 24 – 36 dill pickle chips
- 1 tablespoon blackening seasoning
Instructions
- Preheat your oven to 400°F.
- Pat dry the dill pickle chips on paper towels to remove excess moisture.
- Spray a non-stick 12-cup muffin tin with cooking spray. Place a big pinch of shredded cheese in each cup.
- Top with 2-3 dill pickle chips and sprinkle with blackening seasoning. Finish with more cheese on top.
- Bake for about 15 minutes, until the cheese is melted and golden brown.
- For extra crispiness, transfer the baked chips to an air fryer at 400°F for an additional 5 minutes.
- Serve immediately with your preferred dipping sauce.
Nutrition
- Serving Size: 2 chips (30g)
- Calories: 130
- Sugar: 1g
- Sodium: 280mg
- Fat: 10g
- Saturated Fat: 6g
- Unsaturated Fat: 3g
- Trans Fat: 0g
- Carbohydrates: 2g
- Fiber: 0g
- Protein: 8g
- Cholesterol: 30mg